This article is out of date. Root access is no longer permitted for security.
Install phpMyAdmin on WordPress VPS
Access and make changes to your WordPress MySQL database.
Contact HostJane for root access to your VPS.
phpMyAdmin is a free database management tool.
Because WordPress runs directly on the server, there isn’t a simple backend administrative interface where you can access phpMyAdmin from inside the panel.
Instead, phpMyAdmin must first be installed and then accessed via a standard browser window in Chrome or Firefox.
In this section
- Install phpMyAdmin on WordPress VPS
Download phpMyAdmin
Latest version of phpMyAdmin can be downloaded as a zip file to your local computer.
Click the green download button or the .zip file on the top line of the phpMyAdmin latest releases.
FTP Login to your server
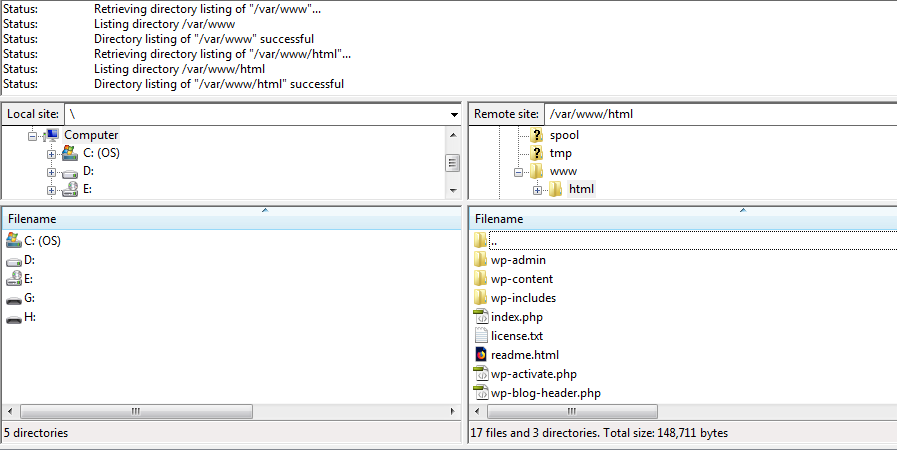
Connect with FileZilla
Enter the following information:
- Host: sftp://[Your_Server’s_IP]
- Username: root
- Password: [Your_Server’s_Password] as found in Statistics
- Port: 22
Navigate to /var/www/html
Open /html folder:
Upload phpMyAdmin to /html folder
In the left window, navigate to the phpMyAdmin .zip file you downloaded in Step 1.
Double-click it to upload it to your server’s /html folder.
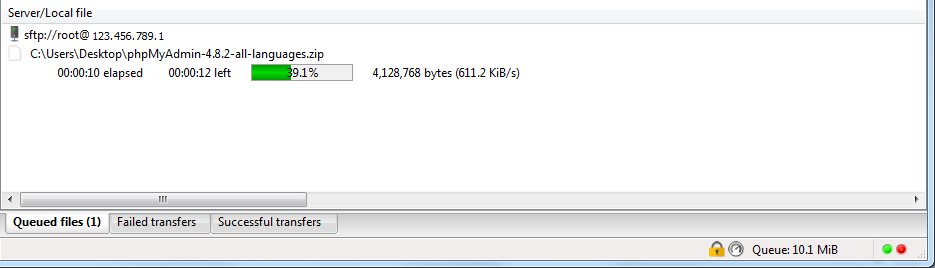
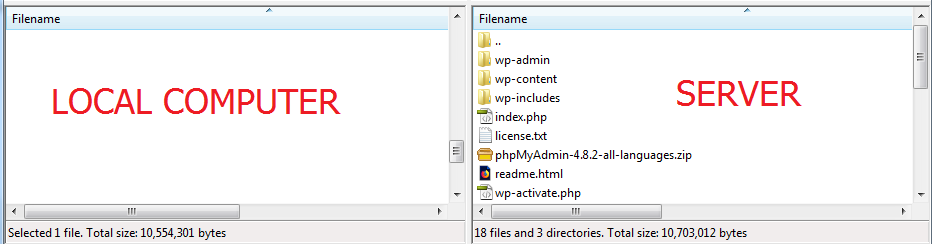
View the uploaded document in the right-hand server window when the 10MB file upload completes:
Unzip phpMyAdmin on the server
You cannot unzip files remotely using FTP.
Login to your server with PuTTY on Windows or an OpenSSH client in linux and MacOS devices to unzip the phpMyAdmin folder.
After logging in, type this command to change directory to /html:
cd /var/www/html
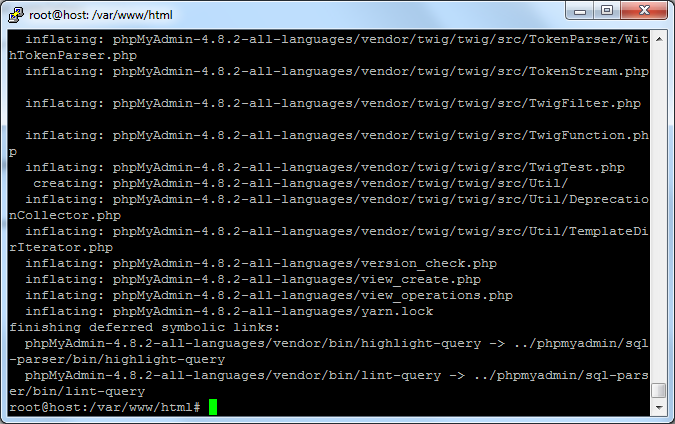
Unzip the file:
unzip phpMyAdmin-X.X.X-all-languages.zip
Replace phpMyAdmin-X.X.X-all-languages.zip with the latest version phpMyAdmin of the one you downloaded.
Press Enter
You will see the phpMyAdmin zip being inflated into a directory folder on your server, and stopping with a lint-query
Change the phpMyAdmin directory name
To protect phpMyAdmin, change the directory name to your chosen name
In this tutorial, we will us: janeadmin
mv phpMyAdmin-4.8.2-all-languages janeadmin
Press Enter.
The cursor will move to the next line, and nothing will have appeared to have happened.
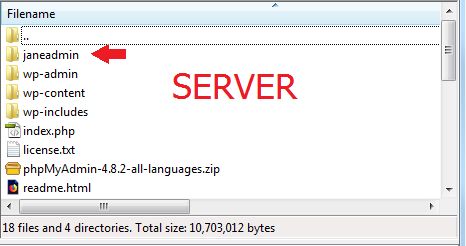
However, if you refresh your FileZilla window, you’ll see a new folder at the top of the tree, janeadmin.
This is visual confirmation the phpMyAdmin folder has been successfully changed.
Create a configuration file for phpMyAdmin
Change the directory of your prompt user to janeadmin
cd janeadmin
Copy config.sample.inc.php and rename the copy to config.inc.php
cp config.sample.inc.php config.inc.php
Now open config.inc.php with nano, the command-line text editor.
nano config.inc.php
You will open the file with nano:
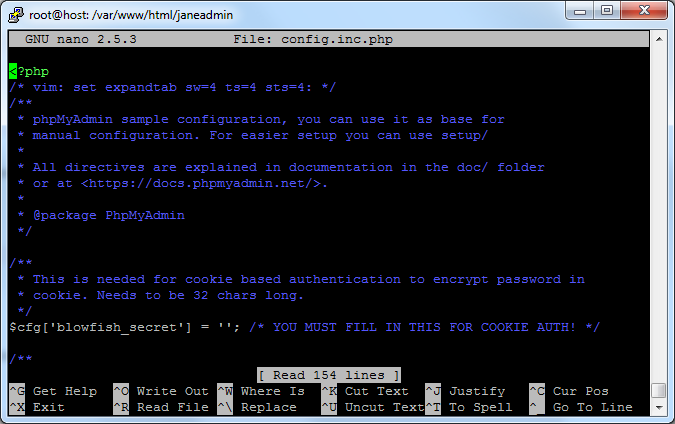
Move the cursor to $cfg[‘blowfish_secret’] = ‘’;
Enter a secret in the ” for blowfish_secret, for example:
$cfg['blowfish_secret'] = 'janedoerocks-2837*2022o6)477sgrg';
Use a random string of numbers, symbols, and letters of at least 32 characters and no more than 46 characters long for your blowfish secret
Write the changes with ctrl + O and press Enter to save the changes
Now exit back to the command line, with ctrl + x
Visit phpMyAdmin in the browser
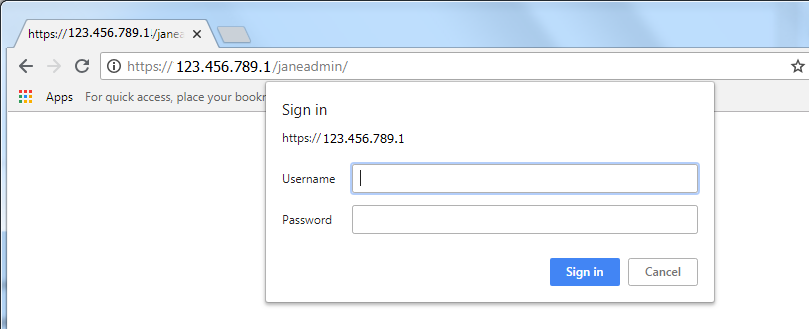
Pull up a fresh browser window like Chrome, and enter into the address bar:
https://[Your_Server’s_IP]/janeadmin

Sign in to phpMyAdmin as root user
Make sure you are logged into the server (via OpenSSH or PuTTY) as the root user
Obtain root password
To find out the root password to login to the phpMyAdmin management tool, enter on the CLI:
cat /root/.my.cnf
The phpMyAdmin root password will be displayed.
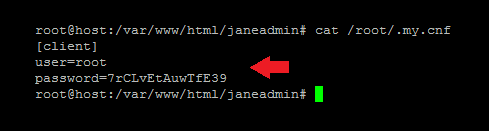
Enter root credentials into browser:
Username: root Password: [As shown in the terminal shell]
Proceed to enter phpMyAdmin

Secure the phpMyAdmin installation
To ensure authorized users only can access phpMyAdmin in the browser, password secure the login.
In SSH, create an encrypted password by typing:
openssl passwd
For demo purposes, we used: 123456
Don’t use an easy password
Use a strong password generator to choose a secure, random password for your site.
Enter 123456
The terminal returns an encrypted pass for 123456 of: Gc0VLaNLNhXoY

Go to the htpasswd directory:
cd /etc/nginx/htpasswd/
The prompt will change to:
root@host:/etc/nginx/htpasswd/$
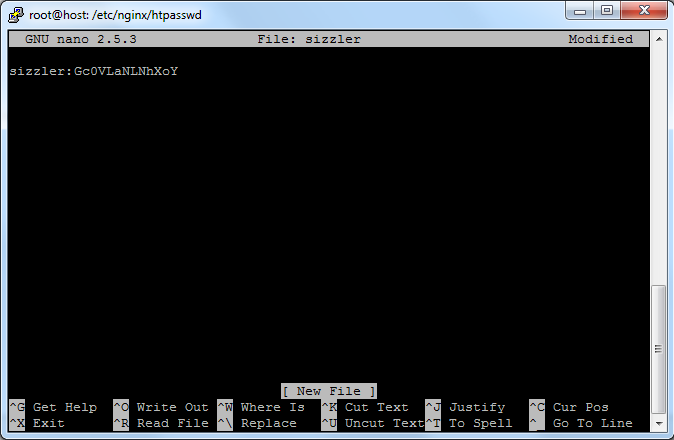
Using the nano command-line text editor to create a new file in the directory, such as sizzler
Replace sizzler with your own username
nano sizzler
The new file will open:

Enter your credentials in the format: Username : Encrypted pass
In the above example, we input:
sizzler : Gc0VLaNLNhXoY
Write changes to the file with: ctrl + O and press Enter to save
Now exit with ctrl + x
Change directory again to:
cd /etc/nginx/conf.d
You need to nano edit 2 different (but very similar looking) files in this directory:
wordpress_http.conf wordpress_https.conf
After changing to the /conf.d directory, first edit wordpress_http.conf
nano wordpress_http.conf
Find the line starting:
location ^~ /wp-admin/ {
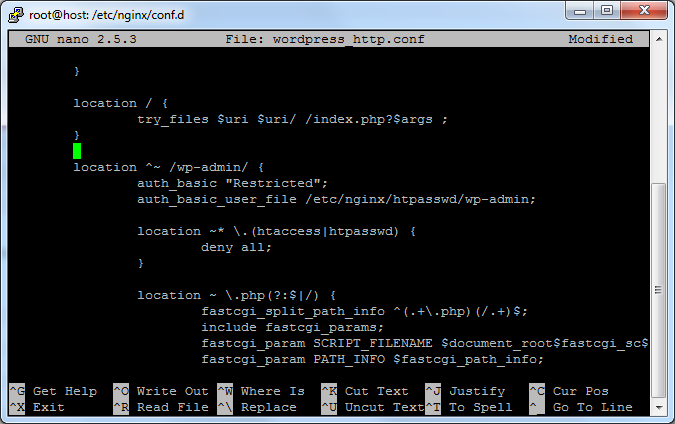
Change /wp-admin/ to /janeadmin/
Next, move the cursor 2 lines down to find :
auth_basic_user_file /etc/nginx/htpasswd/wp-admin;
Change /wp-admin/ to sizzler or the username you selected.
Write changes to the file with: ctrl + O and press Enter to save
Now exit with ctrl + x
The final result should look like:
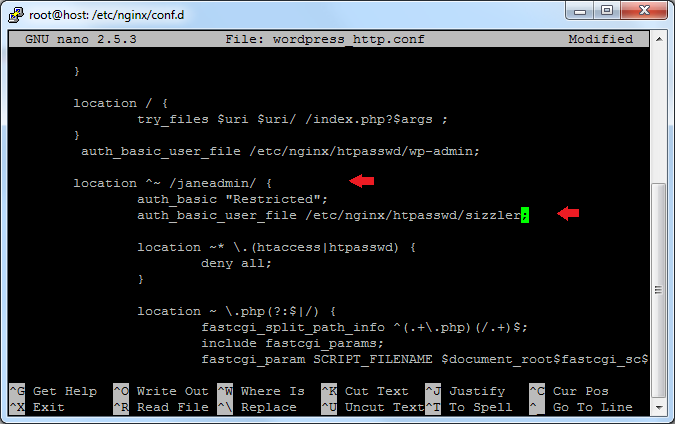
Now make the same edits to the second file: wordpress_https.conf
Finally, restart Nginx to apply changes:
systemctl restart nginx
Congratulations! You have now successfully set up a password screen to login to phpMyAdmin on your server.
In our above example, to login to phpMyAdmin at the security prompt::
Username: sizzler (or your chosen username) Password: 123456 (or your chosen password)
phpMyAdmin is now safely behind locked doors for your use only.